

Webflow custom code and its limits
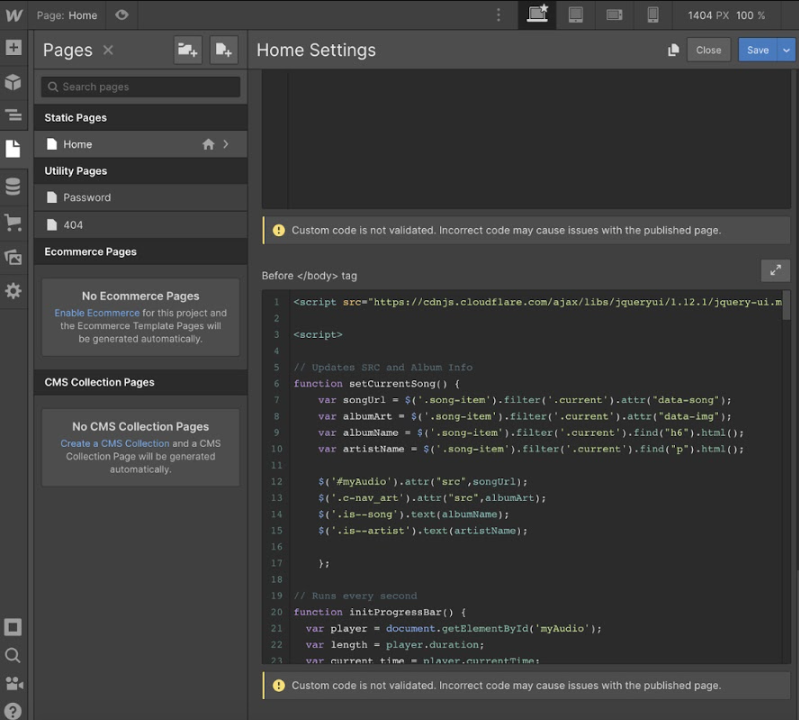
Webflow custom code has certain limits that greatly affect what is possible within Webflow. Some of the most notable, of these Webflow custom code limits, can be found below:
- A strict 50,000 character limit: Your Webflow custom code cannot be longer than 50,000 characters. If it is longer than 50,000 characters, it cannot be implemented. This is true regardless of which paid Webflow plan you subscribe to or which specific section your code is being inserted within.
- HTML, CSS, and JavaScript: Webflow custom code can only be written in HTML, CSS, and JavaScript. If you plan on using other programming languages, you will be unable to do so. You cannot use server-side languages like Perl, Ruby, Python, and/or PHP.
- Certain tags can mess up the layout: Adding “<body>,” “<head>,” and “<html>” tags, into Webflow custom code snippets, can mess up your Webflow website’s layout. Webflow already relies on a layout that can be configured and using these tags is often unnecessary.
Outside of the above, there is something else to know: you can use Webflow custom code on any paid Website plan, including the “Basic plan.” You cannot use Webflow custom code within a free Webflow plan.
How these limits can affect your B2B SaaS website
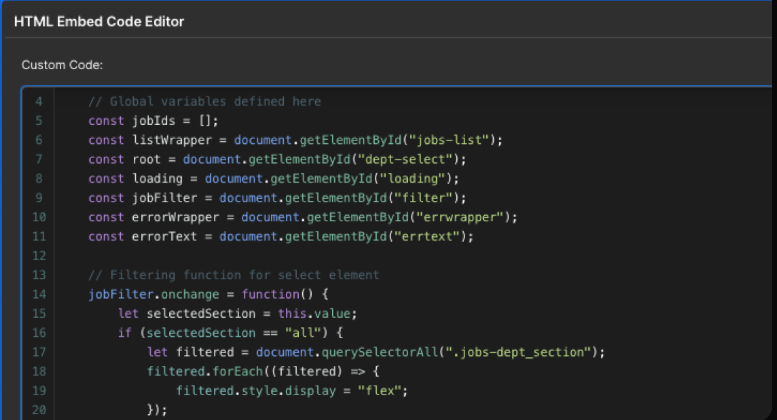
Each one of the Webflow custom code limits clarified above can affect your B2B SaaS website in several key ways:
- You may be unable to implement certain B2B SaaS website features. Real-time dashboards and multi-step calculators, to name two examples, may be unable to live on your native Webflow domain.
- Poorly documented snippets of Webflow code can be difficult to maintain. On top of that, if this code is not implemented properly, it could force key parts of your Webflow website to malfunction.
- Many B2B SaaS websites rely on complex tracking scripts and multiple-touch attribution, among other things. If this code hits Webflow’s character limit, it will stop working without warning.
Webflow is a great platform for any B2B SaaS website. But, Webflow custom code limits can affect your website.
10 Webflow custom code snippets worth adding
The section below contains 10 Webflow custom code snippets worth adding. You can use these Webflow custom code snippets to expand your B2B SaaS website’s overall functionality while making it easier for customers to interact with what you offer. Each one of these snippets requires a Webflow paid plan.
Snippet 01: Auto-select annual vs. monthly billing toggle
<!-- Place before </body> tag -->
<script>
document.addEventListener("DOMContentLoaded", function () {
  const billingToggle = document.querySelector('[data-billing-toggle]');
  if (!billingToggle) return;

  billingToggle.addEventListener('change', function () {
    const isAnnual = this.checked;

    document.querySelectorAll('[data-price-monthly]').forEach(el => {
      const monthly = el.getAttribute('data-price-monthly');
      const annual = el.getAttribute('data-price-annual');
      el.textContent = isAnnual ? annual : monthly;
    });

    document.querySelectorAll('[data-billing-period]').forEach(el => {
      el.textContent = isAnnual ? '/year' : '/month';
    });
  });
});
</script>
Our first Webflow custom code snippet is for an “annual vs. monthly billing toggle.” You can place this snippet within your B2B SaaS pricing page. Doing so will automatically toggle “Annual” billing, letting customers see the “Annual” prices before the “Monthly” prices. This makes it easier for those customers to acquire the “Annual” subscription.
Here is where this snippet goes:
- Open your pricing page and go to “Site Settings.”
- Go to “Custom Code.”
- Insert this snippet before the “</body>” tag.
Snippet 02: Custom brand-text
<!-- Place in <head> tag globally -->
<style>
  ::selection {
    background-color: #4F46E5; /* Your Primary Brand Color */
    color: #FFFFFF;
  }
  ::-moz-selection {
    background-color: #4F46E5;
    color: #FFFFFF;
  }
</style>
Our second snippet lets you select the color of your brand. This means that, if you want your brand to be associated with the color “green,” you can use this code to set the website’s background to that color. Using this snippet gives you more control over the aesthetic/appearance of your B2B SaaS website’s overall text.
Here is where the snippet goes:
- Go into “Site Settings.”
- Click “Custom Code.”
- Add this snippet to “Head Code,” inside of a “<style>” tag.
Snippet 03: Dynamic year updates in the footer
<!-- Place before </body> tag -->
<script>
document.addEventListener("DOMContentLoaded", function () {
  document.querySelectorAll('[data-current-year]').forEach(el => {
    el.textContent = new Date().getFullYear();
  });
});
</script>
<!-- Usage in Webflow text element: add attribute data-current-year="true" -->
Our third snippet automatically updates the year displayed in the footer. If it is 2026 and, then, it becomes 2027, this will automatically be reflected in the footer. You will no longer have to manually adjust the footer once the New Year begins. This can save time and ensures that, regardless of what year it is, that will be reflected in the footer.
Here is where the snippet goes:
- Go to “Site Settings.”
- Click “Custom Code.”
- Add this snippet to “Footer Code.”
Snippet 04: Block mobile input zooming on iOS devices when interacting with input forms
<!-- Place in <head> tag globally -->
<style>
  @media screen and (max-width: 767px) {
    input[type="text"],
    input[type="email"],
    input[type="number"],
    input[type="tel"],
    textarea,
    select {
      font-size: 16px !important;
    }
  }
</style>
Our fourth snippet blocks mobile input zooming on mobile iOS devices when interacting with input forms. On most iOS devices, input fields with a font size of less than 16 pixels will trigger an auto-zoom interaction when focused upon. This often breaks the layout and makes it hard for users to use the form. Integrating this snippet prevents that from happening and allows mobile iOS users to more easily interact with your input forms.
Here is where the snippet goes:
- Go to “Site Settings.”
- Click “Custom Code.”
- Add this snippet to “Head Code.”
Snippet 05: Read time estimator for blogs and documentation
<!-- Place before </body> tag on Blog CMS template -->
<script>
document.addEventListener("DOMContentLoaded", function () {
  const articleBody = document.querySelector('[data-read-time-target]');
  const readTimeOutput = document.querySelector('[data-read-time-output]');

  if (articleBody && readTimeOutput) {
    const words = articleBody.innerText.trim().split(/\s+/).length;
    const wpm = 200; // Average reading speed
    const minutes = Math.ceil(words / wpm);
    readTimeOutput.textContent = `${minutes} min read`;
  }
});
</script>
Our fifth snippet serves as a read time estimator for blogs and documentation. Customers can open a blog post or piece of documentation and, upon doing so, see how many minutes it may take them to read that content. This can increase scroll depth and overall completion rates.
Here is where the snippet goes:
- Go into the appropriate CMS collection page template for your blog posts/documentation.
- Open “Page Settings.”
- Place the snippet before the “</body>” tag.
Snippet 06: Native smooth navbar shadow on scroll
<!-- Place in <head> tag -->
<style>
  .navbar {
    transition: box-shadow 0.3s ease, background-color 0.3s ease;
  }
  .navbar.scrolled {
    box-shadow: 0 10px 30px -10px rgba(0, 0, 0, 0.08);
    background-color: rgba(255, 255, 255, 0.95);
    backdrop-filter: blur(8px);
  }
</style>

<!-- Place before </body> tag -->
<script>
window.addEventListener('scroll', function () {
  const nav = document.querySelector('.navbar');
  if (nav) {
    if (window.scrollY > 20) {
      nav.classList.add('scrolled');
    } else {
      nav.classList.remove('scrolled');
    }
  }
});
</script>
Our sixth snippet creates a user navigation effect that highlights your website’s navigation sticky bars as customers scroll past hero sections. Customers can scroll through a page and see the navigation sticky bars on top of the page at all times, even as they scroll to the very bottom of a page. Using this snippet creates a clean visual hierarchy and makes it easier for customers to explore what you offer.
Here is where the snippet goes:
- Go into “Head Code” and paste the snippet.
- Go into “Footer Code,” which is under “Site Settings.”
- Paste the snippet within the “Footer Code.”
Snippet 07: Dynamic campaign & UTM parameter saver
<!-- Place before </body> tag -->
<script>
document.addEventListener("DOMContentLoaded", function () {
  const urlParams = new URLSearchParams(window.location.search);
  const params = ['utm_source', 'utm_medium', 'utm_campaign', 'utm_term', 'utm_content', 'gclid'];

  params.forEach(param => {
    const value = urlParams.get(param);
    if (value) {
      // Store in SessionStorage so parameters persist across subpages
      sessionStorage.setItem(param, value);
    }
  });

  // Populate hidden inputs in all forms
  document.querySelectorAll('form').forEach(form => {
    params.forEach(param => {
      const val = sessionStorage.getItem(param);
      if (val) {
        let hiddenInput = form.querySelector(`input[name="${param}"]`);
        if (!hiddenInput) {
          hiddenInput = document.createElement('input');
          hiddenInput.type = 'hidden';
          hiddenInput.name = param;
          form.appendChild(hiddenInput);
        }
        hiddenInput.value = val;
      }
    });
  });
});
</script>
Our seventh snippet captures where demo requests, email subscriptions, and signups originate. To do this, the snippet auto-populates all of the Webflow forms across a page while auto-capturing URL parameters. You can use the information created by this snippet for revenue attribution, making it easier to focus on what converts.
Here is where the snippet goes:
- Go to “Site Settings.”
- Click on “Custom Code.”
- Paste this snippet within the “Footer Code” section.
- Or, if it is a lead page, open “Page Settings” and place the snippet before the “</body>” tag.
Snippet 08: Exit-intent modal popup trigger
<!-- Place before </body> tag on high-intent pages -->
<script>
document.addEventListener("DOMContentLoaded", function () {
  const exitModal = document.querySelector('[data-exit-modal]');
  if (!exitModal) return;

  let hasShown = false;

  document.addEventListener('mouseleave', function (e) {
    if (e.clientY <= 0 && !hasShown) {
      exitModal.style.display = 'flex';
      hasShown = true; // Shows only once per session
    }
  });

  // Close button trigger
  document.querySelectorAll('[data-exit-close]').forEach(btn => {
    btn.addEventListener('click', () => {
      exitModal.style.display = 'none';
    });
  });
});
</script>
Our eighth snippet is an exit-intent modal popup trigger for a lightweight lead magnet. If a customer is about to leave your pricing/demo page, this lightweight lead magnet can pop-up. Your lightweight lead magnet can be anything: a whitepaper, ROI calculator, or product overview; among other possibilities. Using this snippet makes it easy for customers to continue exploring your products while ensuring that they get at least one more look at your product before leaving your website.
Here is where the snippet goes:
- Go to “Page Settings.”
- Click on “Custom Code.”
- Paste this code before the “</body>” tag within the “Custom Code” section.
Snippet 09: Auto-focus for input fields
<!-- Place before </body> tag -->
<script>
document.addEventListener("DOMContentLoaded", function () {
  // Focuses field on load or modal reveal
  const targetInput = document.querySelector('[data-auto-focus]');
  if (targetInput) {
    setTimeout(() => {
      targetInput.focus();
    }, 300); // Small buffer for animation load
  }
});
</script>
Our ninth snippet activates auto-focus when customers encounter input fields. Using this snippet means that, when a customer reaches a form, their text cursor will be placed within the primary input field. This greatly reduces user friction and can lead to more sign-ups, leads, and/or conversions.
Here is where the snippet goes:
- Go to “Page Settings.”
- Open “Custom Code.”
- Place the snippet before the “</body>” tag.
Snippet 10: Single-open accordion enforcer
<!-- Place before </body> tag -->
<script>
document.addEventListener("DOMContentLoaded", function () {
  const accordionTriggers = document.querySelectorAll('[data-accordion-trigger]');

  accordionTriggers.forEach(trigger => {
    trigger.addEventListener('click', function () {
      const isCurrentlyOpen = this.classList.contains('is-open');

      // Close all other accordions
      accordionTriggers.forEach(otherTrigger => {
        otherTrigger.classList.remove('is-open');
        const content = otherTrigger.nextElementSibling;
        if (content) content.style.maxHeight = null;
      });

      // Toggle clicked accordion
      if (!isCurrentlyOpen) {
        this.classList.add('is-open');
        const content = this.nextElementSibling;
        if (content) content.style.maxHeight = content.scrollHeight + "px";
      }
    });
  });
});
</script>
Our tenth, and final, Webflow custom code snippet is for complex FAQ pages, feature comparisons, and pricing charts that rely on an accordion design. Using this snippet forces every other accordion section, within a page, to collapse once another section has been opened. This preserves vertical scroll real estate and makes it easier for customers to focus on the piece of content they wish to explore.
Here is where the snippet goes:
- Open “Page Settings.”
- Go to “Custom Code.”
- Place this snippet before the “</body>” tag.
The value of Webflow custom code
Webflow custom code offers an enormous amount of value to B2B SaaS websites:
- You can use Webflow custom code to extend your B2B SaaS website’s overall functionality. This includes live chat widgets, ROI calculators, and analytics tracking systems; among many other things.
- You can use Webflow custom code to implement key website elements without an external framework. You don’t need an external system to implement key functions, which can save time, money, and energy.
- You can use Webflow custom code to fix visual issues/quirks that can make navigation more difficult. CSS properties can be handled in Webflow, letting you implement a visual design that works for your brand.
You can use the snippets clarified above to achieve every single one of the above. If you would like help implementing these snippets, or developing your Webflow B2B SaaS website, you can look at Path to Flow’s “Webflow agencies” page to find someone who can help.

