

There is a specific kind of afternoon every Webflow builder knows. A client rebrands, and now forty blog post titles need one word changed. You export the collection to CSV, run find-and-replace in a spreadsheet, reimport, fix the three items that broke because a reference field did not map cleanly, then republish and hope nothing else moved.
That afternoon is the reason Webflow MCP exists.
The Model Context Protocol is an open standard for connecting AI tools to outside systems. Webflow's implementation lets an agent like Claude, Cursor, or Codex read and write your actual sites: CMS collections, page metadata, elements, styles, variables, custom code, and site analytics. It runs on Webflow's own APIs, so an agent can only do what you can already do under your existing permissions and roles.
What follows is not a tool list. Webflow's docs already have one. These are seven jobs that used to eat a morning and now take a prompt, drawn from Webflow's official prompt library, its developer documentation, and its own tutorial walkthroughs.
1. Manage all Webflow projects in Claude with AgencyFlow
Every job on this list assumes the agent is already pointed at the right site. For anyone running one project, that is a non-issue. For an agency, it is the whole problem.
The Webflow MCP authorizes one project per connection. Working on a second client means disconnecting from the first, restarting Claude, and reconnecting. Do that four times before lunch and the tooling has quietly become the task.
AgencyFlow is a Webflow MCP menubar app from Absurdity Studio that creates a separately named MCP server for each Webflow site and keeps all of them connected at the same time. Each connection is scoped to exactly one site, so an agent editing one client's blog posts has no path to another client's CMS. Separate Claude Code sessions run on separate clients in parallel, and nothing gets torn down in between.
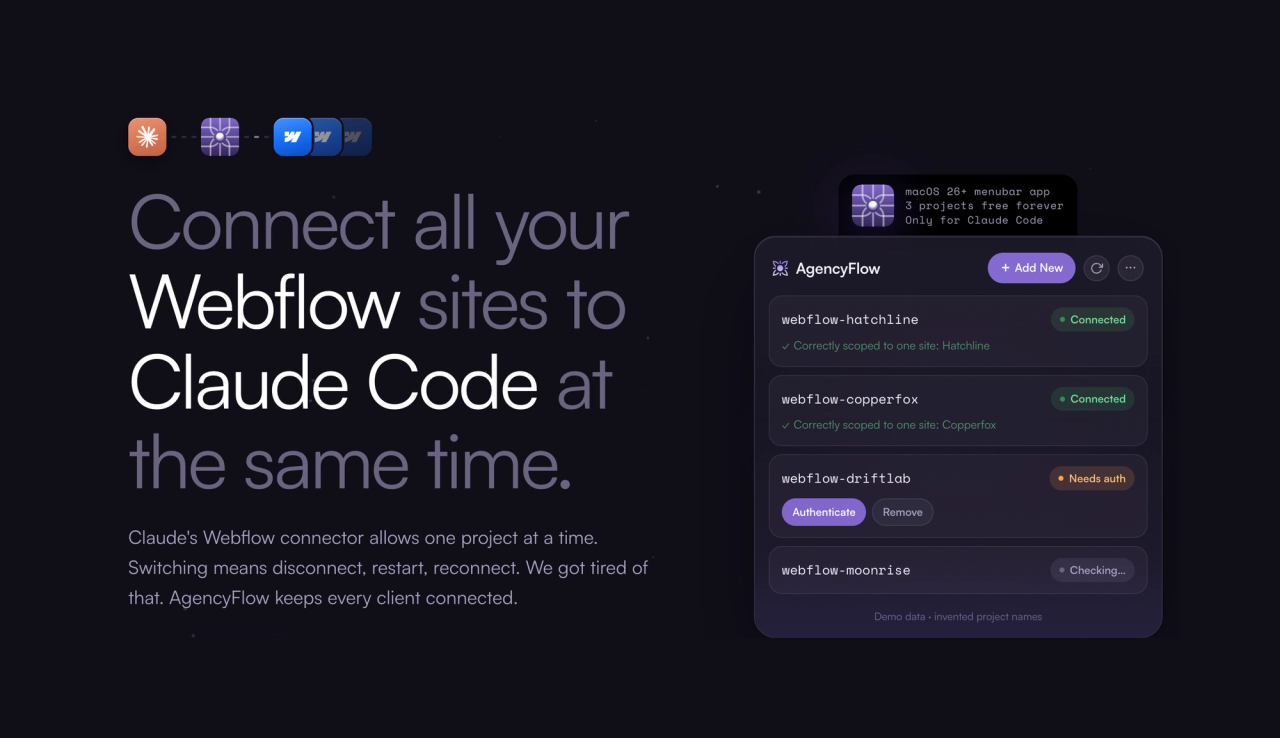
It is Claude Code only, on macOS 26 or later with Apple Silicon. Three projects are free forever, and unlimited projects are $39 a month or $249 a year.
Every job below this one works without it. They just stop being one-site-at-a-time jobs.
2. Bulk find-and-replace across an entire CMS collection
Start with the job that made everyone pay attention.
In Webflow's own Cursor tutorial, the demo site has a batch of blog posts referring to "Seawood" that all need to say "Seawood Ranch." The narrator lays out the manual options first: open each item one at a time, or export to CSV, replace, and reimport. Then he types a single prompt asking the agent to find the site, find the blog post collection, and replace the titles.
The agent builds a task list, runs its tools, and stops to ask permission before writing anything. That pause matters. You see the exact parameters, item by item, before a single live record changes. In the tutorial, the reviewer catches a capitalization mistake in his own prompt at precisely this moment.
His verdict on the whole exercise: it takes a few seconds instead of hours of exporting and reimporting.
The real unlock is not speed on one field. It is that the cost of a small, correct content change drops close to zero. Teams stop batching up trivial CMS edits into a quarterly cleanup ticket because each one no longer costs twenty minutes of CSV surgery.
Prompt shape that works: tell it where to go, then what to do. Name the site, name the collection, then describe the change. Once the agent knows which collection you are in, every follow-up request runs faster because it does not have to make those discovery calls again.
3. Searching inside rich text fields that the Webflow UI cannot search
Try this in the Designer right now: find every blog post whose body mentions a specific phrase.
You cannot. The CMS search matches on item names, not on the contents of a rich text field. So the standard workaround is opening posts one by one, or exporting everything and searching the export.
The Webflow MCP server reads the field contents directly. In the same tutorial, the prompt is roughly "find all blog posts that mention 'conservation' efforts in Seawood Ranch," with the target term in quotes so the agent treats it as an exact string. It returns three matching posts, which the narrator then verifies by hand in the collection.
This one is quietly the most useful item on the list, because it is a capability rather than an acceleration. Everything else here makes an existing task faster. This makes a previously impossible task possible.
It also compounds. Once the agent has surfaced the matching set, you can chain the next instruction onto it: swap that term for a new one, add a paragraph to each of those specific posts, or tag them. That is content operations work that would otherwise require an export, a script, and a reimport.
4. A site-wide SEO metadata audit that actually applies the fixes
Most SEO audit tools produce a spreadsheet. You then spend the following week doing what the spreadsheet said.
Webflow ships an official SEO Metadata Auditor prompt that closes that loop. It checks every page for missing or weak SEO metadata, suggests improvements, and makes the changes, with your approval on each write. The related SEO Keyword Optimizer prompt goes a step further: it reviews static pages and CMS items, then updates copy, meta titles, and descriptions against a keyword goal you set.
For an agency running a portfolio of client sites, this changes what is economically sensible to offer. A metadata pass across a 60-page site has historically been a line item nobody wants to quote and nobody enjoys doing. It is now a repeatable prompt you can run at the start of every engagement.
Two cautions worth stating plainly. First, an agent writing title tags at scale will produce competent, generic output unless you give it your positioning, your audience, and your keyword targets in the prompt. Second, review before approving. The permission gate is there for a reason, and metadata is public-facing.
Treat it as a very fast junior doing the first pass, not as a finished deliverable.
5. Retroactive internal linking across your back catalog
Every content team has the same debt. You have published eighty posts. Roughly six of them link to each other.
Internal linking is the highest-leverage SEO chore in existence and it never gets done, because doing it properly means holding eighty articles in your head at once and remembering which older post should point at which newer one.
Webflow's own starter prompts include this exact job: find older blog posts that mention similar topics and add internal links to your latest post. Combine it with the rich text search from item two and you have a workable loop. Publish a new piece, ask the agent to find every existing post that discusses the topic, then have it insert contextual links back to the new piece.
The starter set includes a companion prompt worth running on the same pass: analyze your last five blog posts and suggest new topic ideas with SEO keywords. Same context, same session, no extra setup.
Do this once a month rather than once a year and the compounding is real. The work that used to justify hiring a contractor for a week now fits inside a single working session.
6. Converting hardcoded colors and spacing into a real variables system
Every Webflow project starts with good intentions about a design system. Then a deadline arrives, someone types a hex code directly onto a class, and eleven months later the brand color exists in thirty-four slightly different forms across the site.
The official Variables Refactor prompt exists for exactly this. It finds all hardcoded colors, spacing, and font values across the site, then converts them into a design system built on Webflow variables.
The reason this matters more than it sounds: variables are what make a future rebrand a five-minute job instead of a three-week project. A site built on hardcoded values has to be re-audited by hand every time the brand shifts. A site built on variables changes at the source.
Nobody quotes this work to a client because it is invisible. It produces zero new pages and zero new features, and explaining the value requires a conversation about technical debt that most stakeholders do not want to have. So it stays undone.
When the refactor costs a prompt and a review pass instead of two developer days, the calculus changes. This is the item where the Webflow MCP most clearly pays for itself on long-lived sites.
7. Broken and insecure link cleanup, including inside CMS content
Broken links are a slow leak. They cost you a little SEO credibility and a little user trust, continuously, and they are invisible until someone complains.
Webflow's Link Auditor and Fixer prompt finds and fixes broken or insecure links across an entire site, and critically, it covers CMS content too. That last part is what separates it from a standard crawler workflow. Most link checkers will tell you a URL inside a rich text field is dead. Very few will go in and fix it.
Insecure links deserve their own mention. Old http:// references sitting inside blog posts written years ago are the kind of thing that never surfaces in a Lighthouse report but quietly undermines a site that is otherwise clean.
This is the best candidate on the list for scheduled maintenance. Run it quarterly across every site you manage. It is cheap, low-risk, and the output is easy to verify because a link either resolves or it does not.
8. Rescuing styles applied on the wrong breakpoint
You have done this. Everyone has done this.
You spend ninety minutes styling a section, step back, feel good about it, and then notice the breakpoint selector at the top of the Designer was on tablet the entire time. Desktop is untouched. The work is not lost exactly, but it is in the wrong place, and moving it means redoing every property by hand at the correct breakpoint.
Webflow published a prompt specifically for this. The Breakpoint Styles Migrator rescues design work done on the wrong breakpoint by copying or moving styles from one breakpoint to another. There is a sibling prompt, the Breakpoint Optimizer, that systematically updates CSS styles across all Webflow breakpoints for responsive consistency.
Of everything here, this is the one most likely to make a working Webflow designer sit up. The others save time on tasks you knew were slow. This one recovers time you had already written off as lost.
It also points at the broader pattern. The Webflow MCP is at its strongest on mechanical, repetitive, well-defined operations across many objects. It is at its weakest on judgment. Migrating styles between breakpoints is pure mechanics, which is exactly why it works so well.
What the Webflow MCP will not do
The ranking pages for this topic are mostly documentation, and documentation is not incentivized to lead with limitations. Here are the ones that will actually affect your week, straight from Webflow's own overview page.
- No Interactions. The MCP server cannot yet create or apply Webflow Interactions (IX3). Build and edit those manually in the Designer.
- No image generation. In Webflow's tutorial, the agent drafts a full blog post with a name, slug, body, and summary, but no images. Those go in by hand.
- No new localized CMS items. It can read and update existing CMS items and static content in secondary locales, but not create new localized items.
- One workspace per authorization. Switching workspaces means re-authenticating. For connector-based clients like Claude and ChatGPT, that means removing and reinstalling the connector.
- Some things need the Designer open. Capturing visual snapshots of elements, and reading or changing the current selection, page, mode, branch, canvas, and breakpoints all require the Webflow Designer open with the MCP Bridge App connected. Everything else, including most CMS and Data API work, runs without it.
- No permissions changes. It cannot add users or assign roles. It operates strictly inside the permissions you already have.
The most useful mental model: it is excellent at bulk operations on things that already exist, and limited at creating things that require visual judgment.
FAQ
What is Webflow MCP?
Webflow MCP is Webflow's Model Context Protocol server, which connects AI agents and tools directly to your Webflow projects. It exposes Webflow's Data and Designer APIs as tools an agent can call, so you can create elements, styles, components, and variables, manage CMS collections, custom code, and assets, and read site analytics using natural language instead of writing API calls. Every action runs inside your existing Webflow permissions and roles.
How do you use the Webflow MCP?
Connect your AI client to the server, authorize the workspace you want it to access, then prompt it. In Cursor, that means opening Settings, going to Tools and MCP, adding a custom MCP server, and pasting the configuration snippet from Webflow's developer docs. An OAuth screen opens where you select which workspace to authorize. Webflow provides plugins for several popular agents including Claude Desktop, Claude Code, Cursor, Postman, and Windsurf, and you can also connect other clients manually.
Does Claude work with Webflow?
Yes. Claude Desktop and Claude Code both connect to the Webflow MCP server, and Webflow offers a first-party connector for Claude. Once authorized, you can design pages, manage CMS content, and work directly in your Webflow sites from a Claude conversation. Note that each authorization covers a single workspace, so working across multiple client workspaces means reconnecting between them.
Do I need the Webflow Designer open to use it?
Usually not. Most of the server's work runs through the Data API, which covers CMS content, pages, assets, fonts, elements, components, styles, and variables. The MCP Bridge App, which installs automatically to your authorized sites during authorization, is only required for capabilities that depend on a live Designer session, such as capturing visual snapshots or reading and changing the current selection, page, mode, or breakpoint. When you do need it, open your site in the Designer, launch the Bridge App from the Apps panel, and leave it running. You can minimize it once it connects.
Is it safe to let an AI agent edit a live client site?
The server enforces your existing Webflow permissions and roles, so an agent cannot do anything you could not do yourself, and only site owners and admins can authorize it. Beyond that, most clients require explicit approval before write operations, showing the exact parameters of each change before it runs. The practical safeguards are the ordinary ones: authorize as few sites as necessary, read the parameters before approving, and run the first few jobs on a staging site until you trust the pattern.
Where to start
Pick the cheapest reversible job first. A link audit or a metadata pass on a site you own is low-risk, easy to verify, and gives you a feel for how the permission prompts behave before you point an agent at a client's live CMS.
Then work up to the ones that actually move your margins. The variables refactor in item five and the retroactive internal linking in item four are the two with the largest gap between what they cost you today and what they cost with an agent doing the mechanical work.

